This post is a review of my current experience of using Gemini CLI for software development. One of the key skills as a software developer at the moment, is to be ready for working alongside a foundational model such as Gemini. I have seen countless posts and job specs asking for ability to work, create and review code generated by a foundational model, in an approach known as vibe coding.
My understanding of vibe coding as a concept is that we provide the model with a list of features and requirements as context and allow the model to autogenerate the entire project for you. In my use case, I’m interested to see how this applies to current projects that have already been developed, in the areas of automation.
I use one of my current personal project as a testbed, a simple FastAPI application to upload image files to S3. It has a single API endpoint /upload/s3 and I have been testing all the upload via the Swagger UI Docs. I have the current features which I want to delegate to Gemini CLI to handle:
- Create a React UI frontend to handle file uploads via the API.
- Run basic linting and formatting using ruff of the python backend.
- Create a set of pre-commit hooks for ruff.
Before all the above, we need to install the Gemini CLI and set it up first. On Linux, it can be installed globally via the Gemini CLI installation guide. It is recommended to obtain an API Key via the Google AI Studio app and export it as an environment variable using GEMINI_API_KEY or via the command prompt after starting the CLI with gemini.
Start the CLI within the application project folder. On the CLI, I ran the command /init to allow Gemini to analyze the current application project folder and generate a custom GEMINI.md, which will be used as context to the Gemini agent.
Next, you can enter your own custom prompt into the CLI to the gemini agent. In my first request, I asked the agent to generate a simple React UI to work with the FastAPI upload service using the following prompt:
> implement a react ui frontend to allow file uploads to the apiThe agent proceeded to create a sub directory called frontend with a simple but fully functioning React UI that includes a file uploader to allow multipart uploads to the API. The screenshot belows show the artifacts created:


The agent also updated the GEMINI.md file with its own outputs and steps.
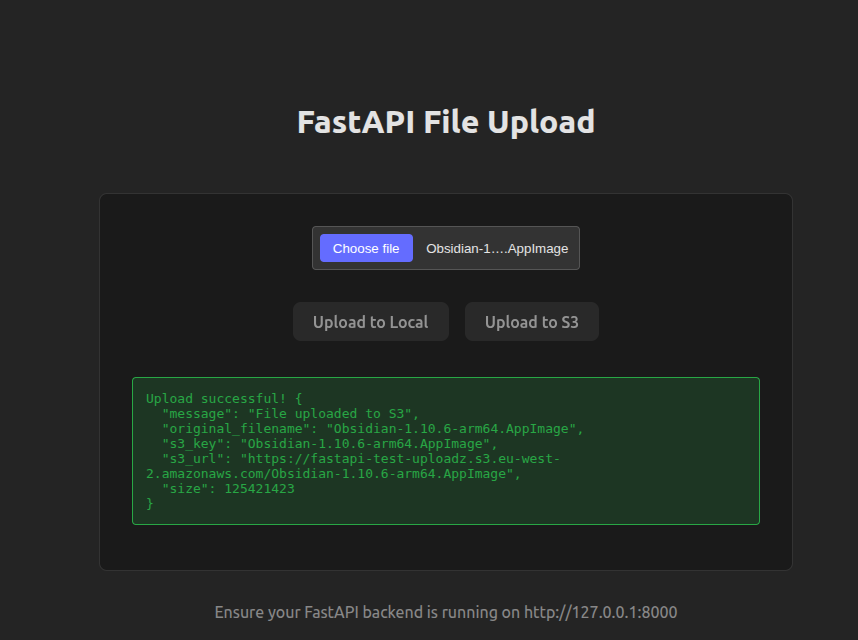
I examined and validated the React source code created in TypeScript and it appears to be valid code. Next, I installed the frontend dependencies using npm in its sub directory and started the API in another terminal for testing. The UI can indeed upload files via the API to S3 as shown in the screenshot below:
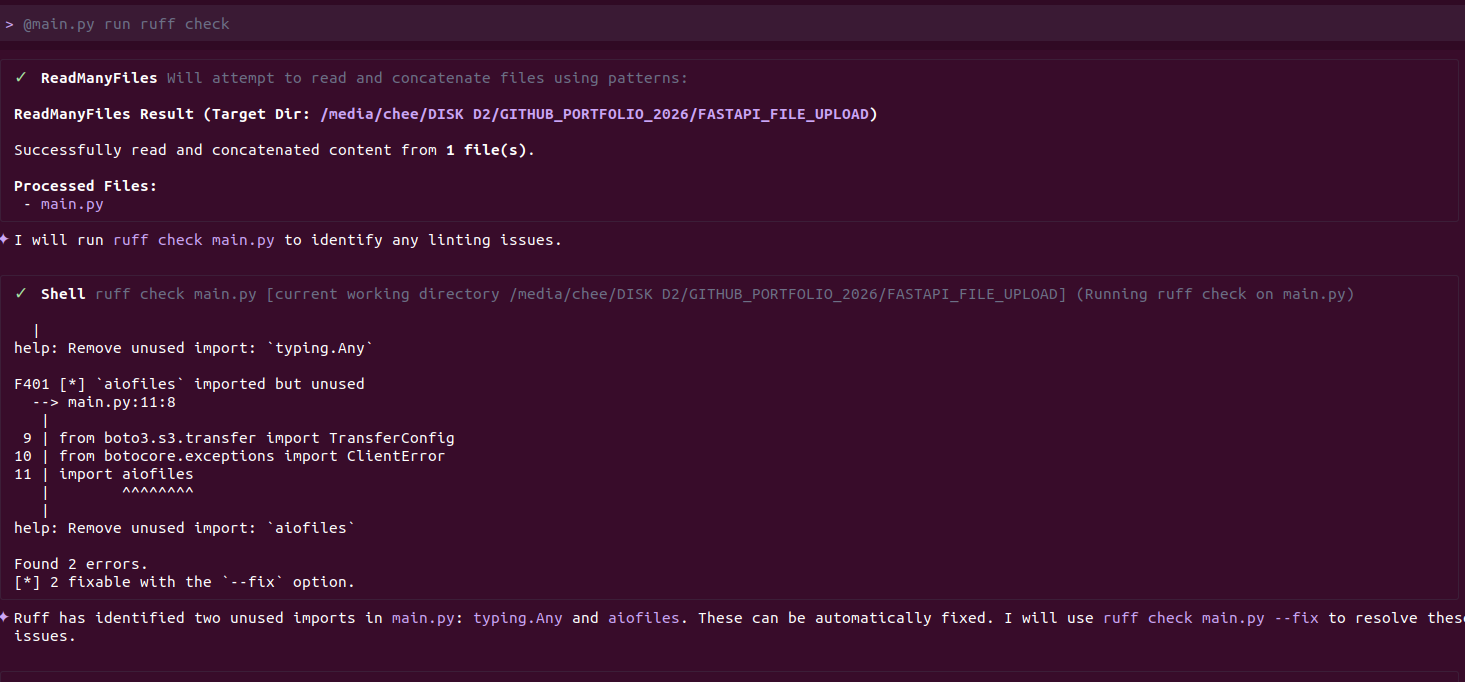
The next automation step was to run linting and formatting on the python backend code using ruff. Although I could run the commands manually, I wanted to test the agent ability in executing shell commands. I passed the following prompt to the agent:
@main.py run ruff check
@main.py run ruff format
The agent was able to detect and format the main.py file using ruff automatically as shown in the screenshot below:
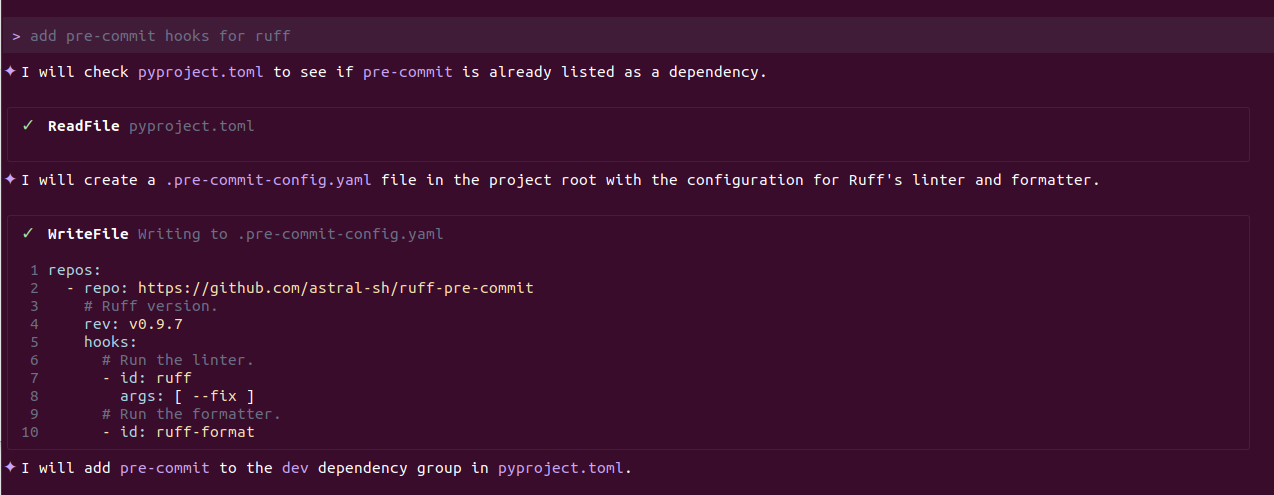
Lastly, I asked the agent to setup pre-commit hooks using ruff. Unfortunately, I did not mention using the uv tool so it was unable to find it and subsequently pre-commit was not installed correctly. However, it did manage to create the .pre-commit-config.yaml file and updated the GEMINI.md with the required instructions. The version of pre-commit installed for ruff was the older version so I had to manually update it in the generated config file:
To allow the gemini CLI access to the local file system, you would need to grant it permission. Every interaction with the file system would ask for your permission first using one of the following three options:
Allow once: Runs the command one time.
Allow always: Trusts this specific command for the rest of the session.
Deny: Stops the agent.
Since it’s able to run shell commands, the recommendation is to start the CLI in sandbox mode, which runs all shell commands inside a Docker container:
gemini --sandboxWithin minutes of setting up and running Gemini CLI, I managed to create a working React UI and setup automatic linting with pre-commit hooks. This is a productivity boost. Rather than using it for code generation, I will attempt to focus on how this can be used to automate development tasks and use it as an additional tool in the SDLC process.
You can extend the capabilities of the Gemini CLI by using agents or extensions. In future posts, I will explore the capabilities of these features. For instance, using the Github extension, you could connect the GIthub repository to your workflow and get the agent to generate features from a todo list which you can review as a pull request.
Custom commands allow you to package frequently used prompts into a single package which can be shared and distributed within a global or project level.
In summary, the use of Gemini CLI in SDLC has been interesting and productive in the short time I experimented with it. I will be using it in future endeavours to understand how it could benefit software development. One of the interesing thing I found was that its not always right. When asked to install the pre-commit hooks, it installed the older version, which I had to manually adjust. One must still check its outputs to ensure it is accurate.