In web projects, it is common practice to upload UI assets into S3 and associate a Cloudfront distribution with it to speed up delivery of assets. Generally, these CDNs are public accessible over the public internet.
However, there might be instances whereby certain files are restricted but you still want to make use of Cloudfront. By default, under the Security tab for each distribution, you can restrict access via Geographic locations or even enable AWS WAF ( Web Application Firewall ). But to use WAF, there are additional charges for each request made to the distribution and may not be practical for a web application. In addition, the security is applied to the entire distribution rather than individual files.
To restrict access to the files behind the distribution, we can Restrict content with signed URLs and signed cookies. For both signed urls and cookies, we need to generate a private-public keypair and upload the public key to CloudFront while we use the private key to sign the request or to generate the cookies. Cloudfront will use the public key from the keypair to authenticate and verify that the signature has not been tampered with.
As per the Cloudfront documentation, we use signed urls when:
- we are accessing a specific resource
- The HTTP client we are using doesn’t support the use of cookies.
The recommendation for using signed cookies is when:
- we are accessing multiple files from the distribution e.g. all *.jpeg images
- we are unable to change the CF Url
Firstly, we need to use openssl to create a private-public key pair. The private key must be RSA 2048 or ECDSA 256 compatible. I ran the following command below to create a test keypair for this post:
openssl genrsa -out private_key.pem 2048To retrieve the private key, we run the following command:
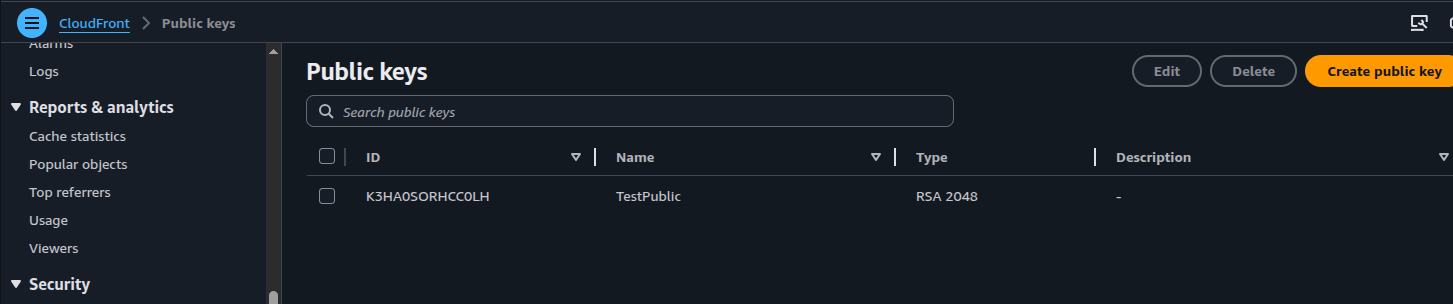
openssl rsa -pubout -in private_key.pem -out public_key.pemNext, we upload the public key to Public Keys under Cloudfront:
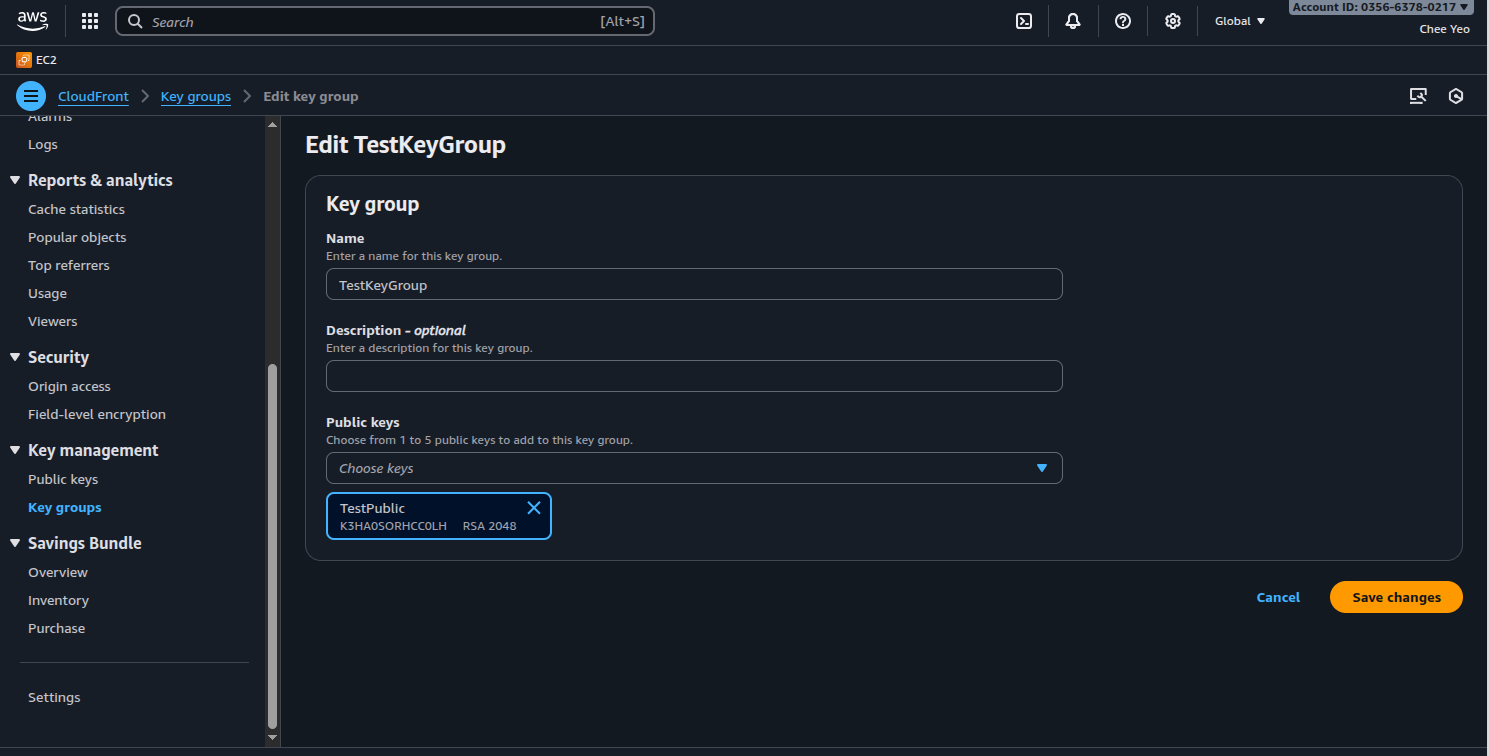
Once completed, we create a Trusted Key Groups in CloudFront and reference the uploaded public key:
Next, we modify the distribution behaviour and change it to Restrict viewer access and select the Trusted key group created previously. Below is a screenshot that shows the process:
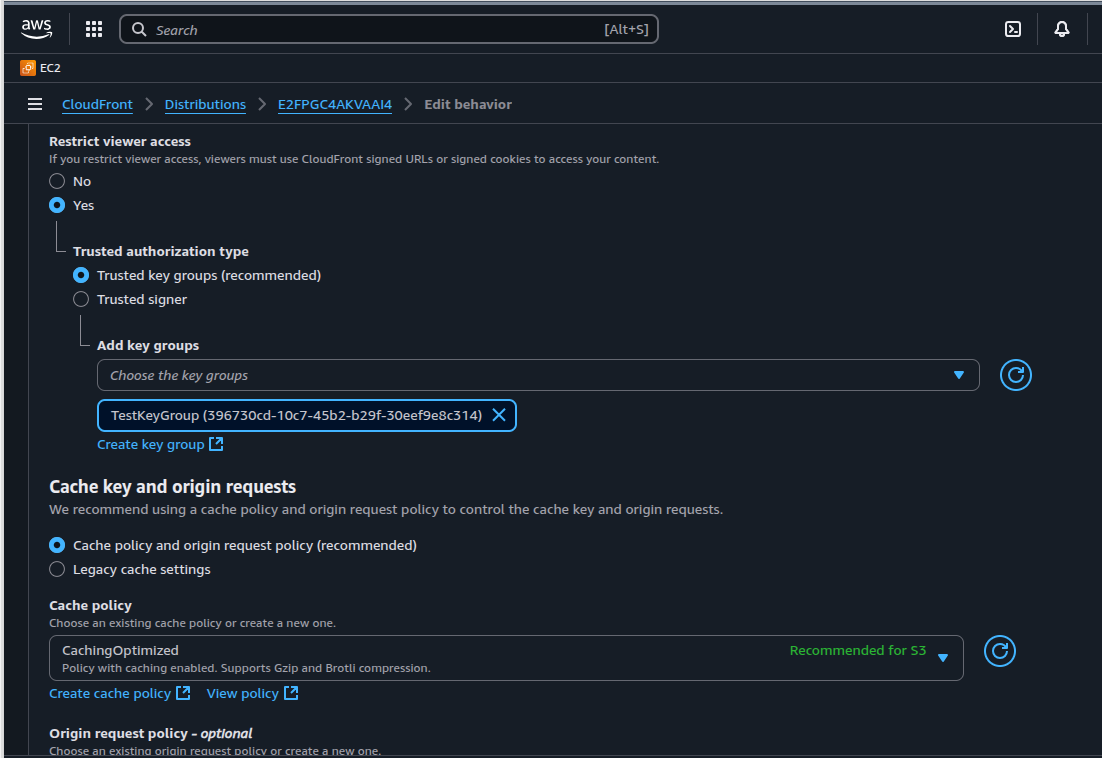
The above is known as associating a signer with the distribution. Each signer ( keypair ) is associated with the cache behaviour of the distribution. It’s possible for a distribution to have multiple behaviours and only some of them have a signer associated.
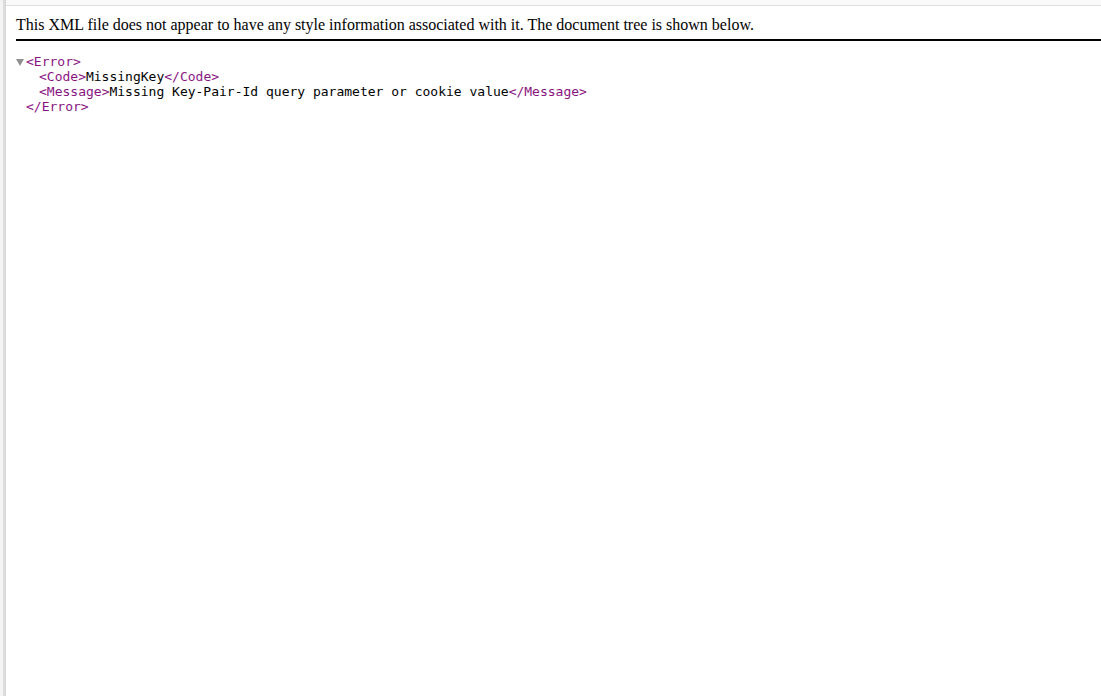
After applying aa signer, if we try to access the public url of the Cloudfront distribution for that specific file directly, it will fail with error message of missing private - public key pair. The distribution is looking for a Signature query parameter. Cloudfront will block access if this is missing.
The example below uses the cryptography and boto3 libraries to generate a signed url using the CloudFrontSigner class in boto3:
The script generates a signed url which allows limited time access to the file. In the example given, it’s set to 24 hours. The screenshot below shows successful access to the same file:
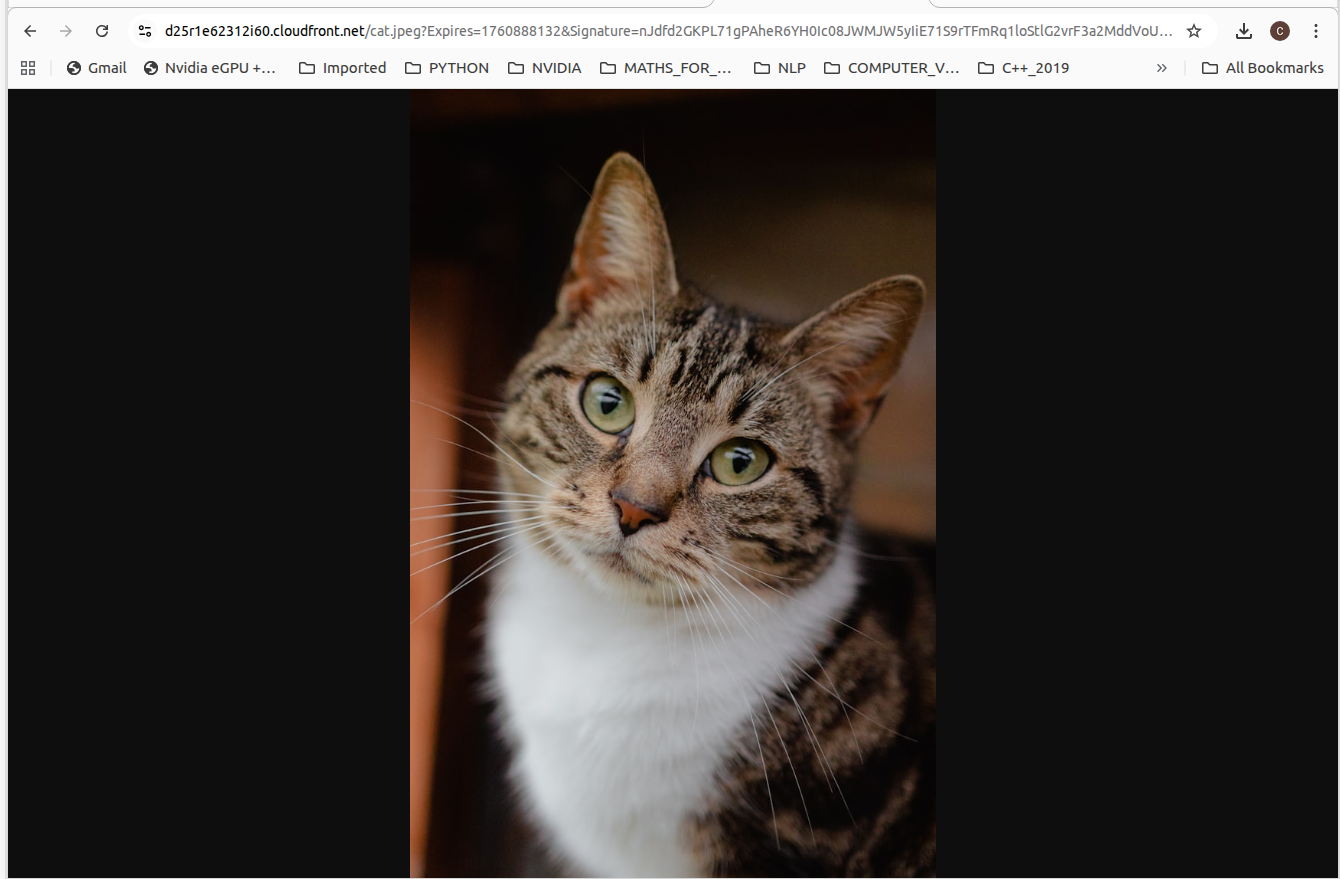
The format of the URL returned is of the format:
https://ZZZZZ.cloudfront.net/cat.jpeg?Expires=1760888132&Signature=XXXXXX&Key-Pair-Id=YYYYYYYYYThe signer generates a URL with 3 additional query parameters:
- Expires
- Signature
- Key-Pair-Id
The Expires query parameter is set using the expires_in parameter to the cloudfront_signed_url method. The Signature is created using the private key created earlier and calling the cloudfront_signer.generate_presigned_url method. The Key-Pair-Id specifies the public key uploaded to Cloudfront.
To generate signed cookies, we need to attach a policy to the cookie body else the request will fail with missing or malformed policy error. The example code above creates a method cookie_policy that sets the url and expirty date. The policy is a JSON document string of the format, as specified in Custom policy for signed cookies:
{
    "Statement": [
        {
            "Resource": "URL of the file",
            "Condition": {
                "DateLessThan": {
                    "AWS:EpochTime": 1760878427 # int value of timestamp
                }
            }
        }
    ]
}
In our example, we are only setting the resource url and the expirty date. We can also add other conditions such as IP addresses ranges and date greater than.
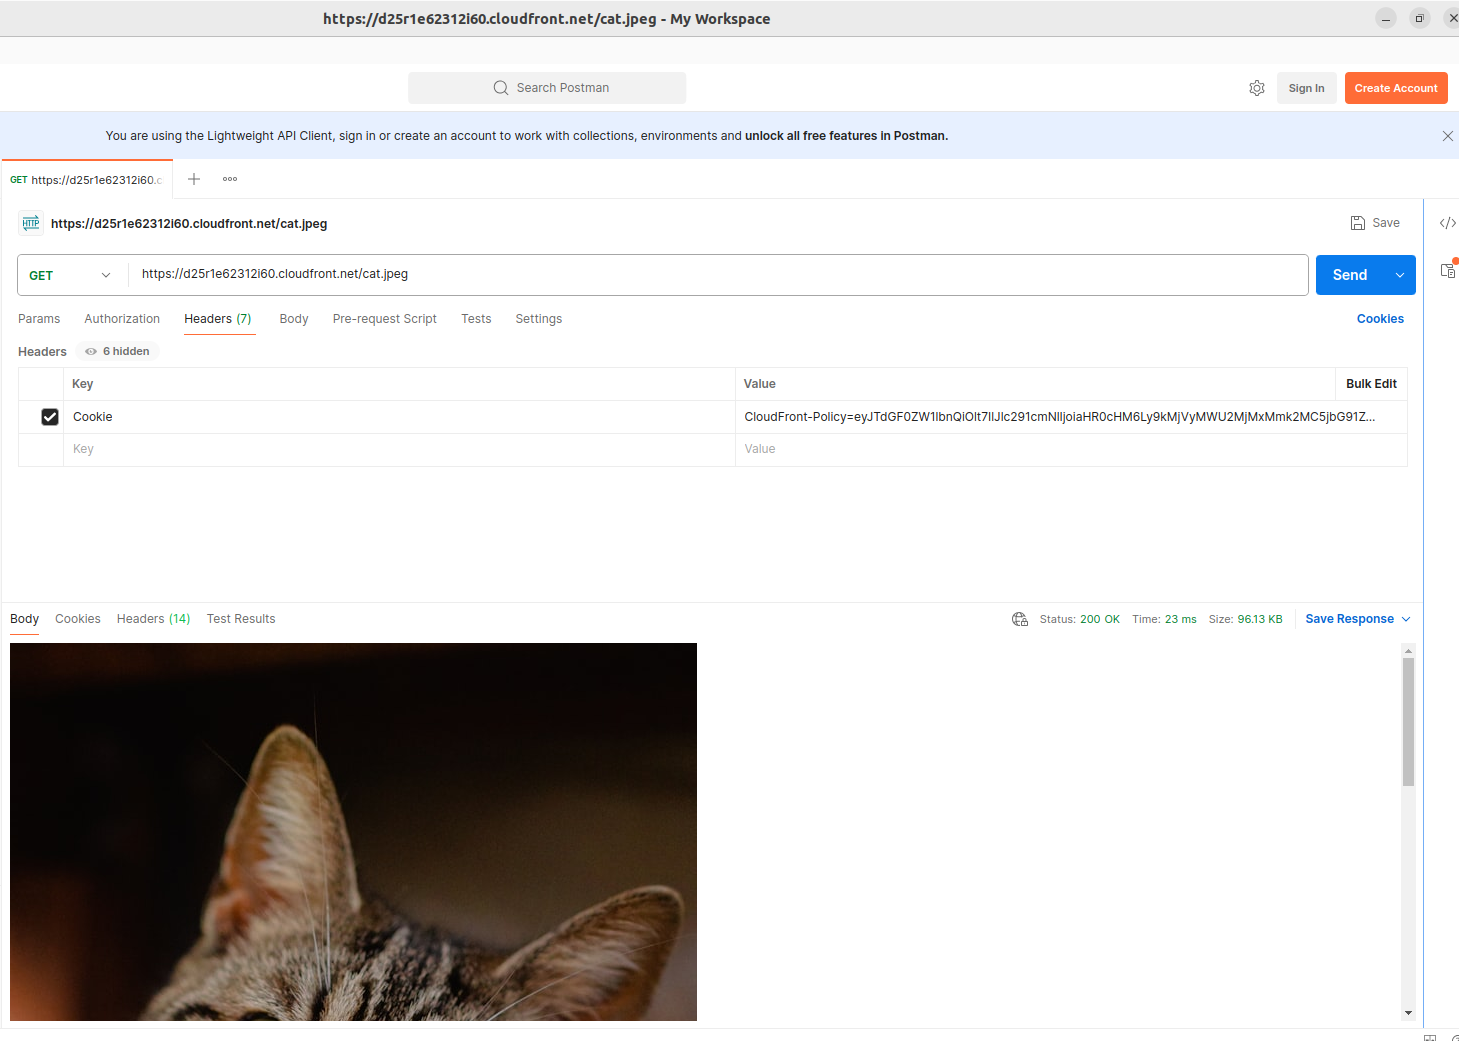
The policy is signed directly by the private key to generate the signature. Next, we encode the policy using utf-8 and invoke replace_chars to replace certain characters in both the signature and policy as specified by the documentation Creating policy statement for signed cookies. The function cloudfront_signed_cookies generates the cookie body with the following values:
- CloudFront-Policy
- CloudFront-Signature
- CloudFront-Key-Pair-Id
Each of the above must be passed as the Cookie header. Below is a screenshot using Postman to test the same request as for the signed url:
How does it work?
In CF distribution, when you associate a Trusted Key Group, CF uses the public key associated with it to verify the URL signature or cookies.
For signed urls:
-
Your application uses the private key to generate the URL signature.
-
Within your application, you set restrictions on the conditions to access the files i.e. based on whether the user is logged in or not.
-
After user access is granted in your application, it uses something like
boto3to generate the signature using the private key and returns it to the user. -
The user access the signed url using a browser for example.
-
CF receives the signed url or cookie and verifies the signature using the public key; if is not tampered with, it then checks the expiry date and any custom policy attached to ensure its still valid. If its valid, access is allowed.
For signed cookies:
-
Within your application, you set restrictions on the conditions to access the files i.e. based on whether the user is logged in or not.
-
After user is granted access, your application should set three
Set-Cookieheaders in the response with the keys ofCloudFront-Policy;CloudFront-Signature;CloudFront-Key-Pair-Idand returns them to the viewer. -
When the user requests a file, the user’s browser receives those response headers and adds them to the
Cookieheader before submitting to CF. This represents the signed cookie. -
CF receives the signed cookie and validates the signature using the public key. If the signature is valid, it validates the policy statement in the cookie. If both the signature and policy are valid, it permits access.
For both scenarios, Cloudfront checks the edge cache location to determine if the file is available; if not it forwards the request to the origin and returns the file to the user while also updating the edge cache location ( write-through cache )